Effective Image SEO not only improves search engine rankings but also elevates the overall user experience by ensuring images are relevant, optimized, and easily accessible. At Octopuswriters, we specialize in creating content that combines visual appeal with SEO best practices, helping your images work harder for your brand. Dive into our guide to learn how strategic image optimization can boost your site’s performance and make a lasting impact on your audience.
What Is Image SEO?
Image SEO involves enhancing images on your website to increase the likelihood that both the images and associated pages will rank well in organic search engine results, ultimately attracting more visitors to your site.
Some effective tactics for image SEO include:
Adjusting image sizes and compressing them to improve page loading speed
Using descriptive, keyword-rich file names for images
Adding relevant alt text that describes each image accurately
By implementing these techniques, search engines like Google can more easily locate and interpret your images, increasing the chances they’ll appear for pertinent search queries. This not only helps your pages gain visibility but also boosts page load times-another key factor Google considers in its ranking algorithm.
Optimized images create a better user experience by providing faster access to information. Both Google and your site visitors appreciate pages that load quickly and offer clear, useful content, making image SEO a win-win for user satisfaction and search visibility.
Where Can Images Appear in Search?
A major advantage of optimizing images for SEO is that it boosts the chances of your images showing up in search engine results pages (SERPs), driving valuable clicks from potential visitors.
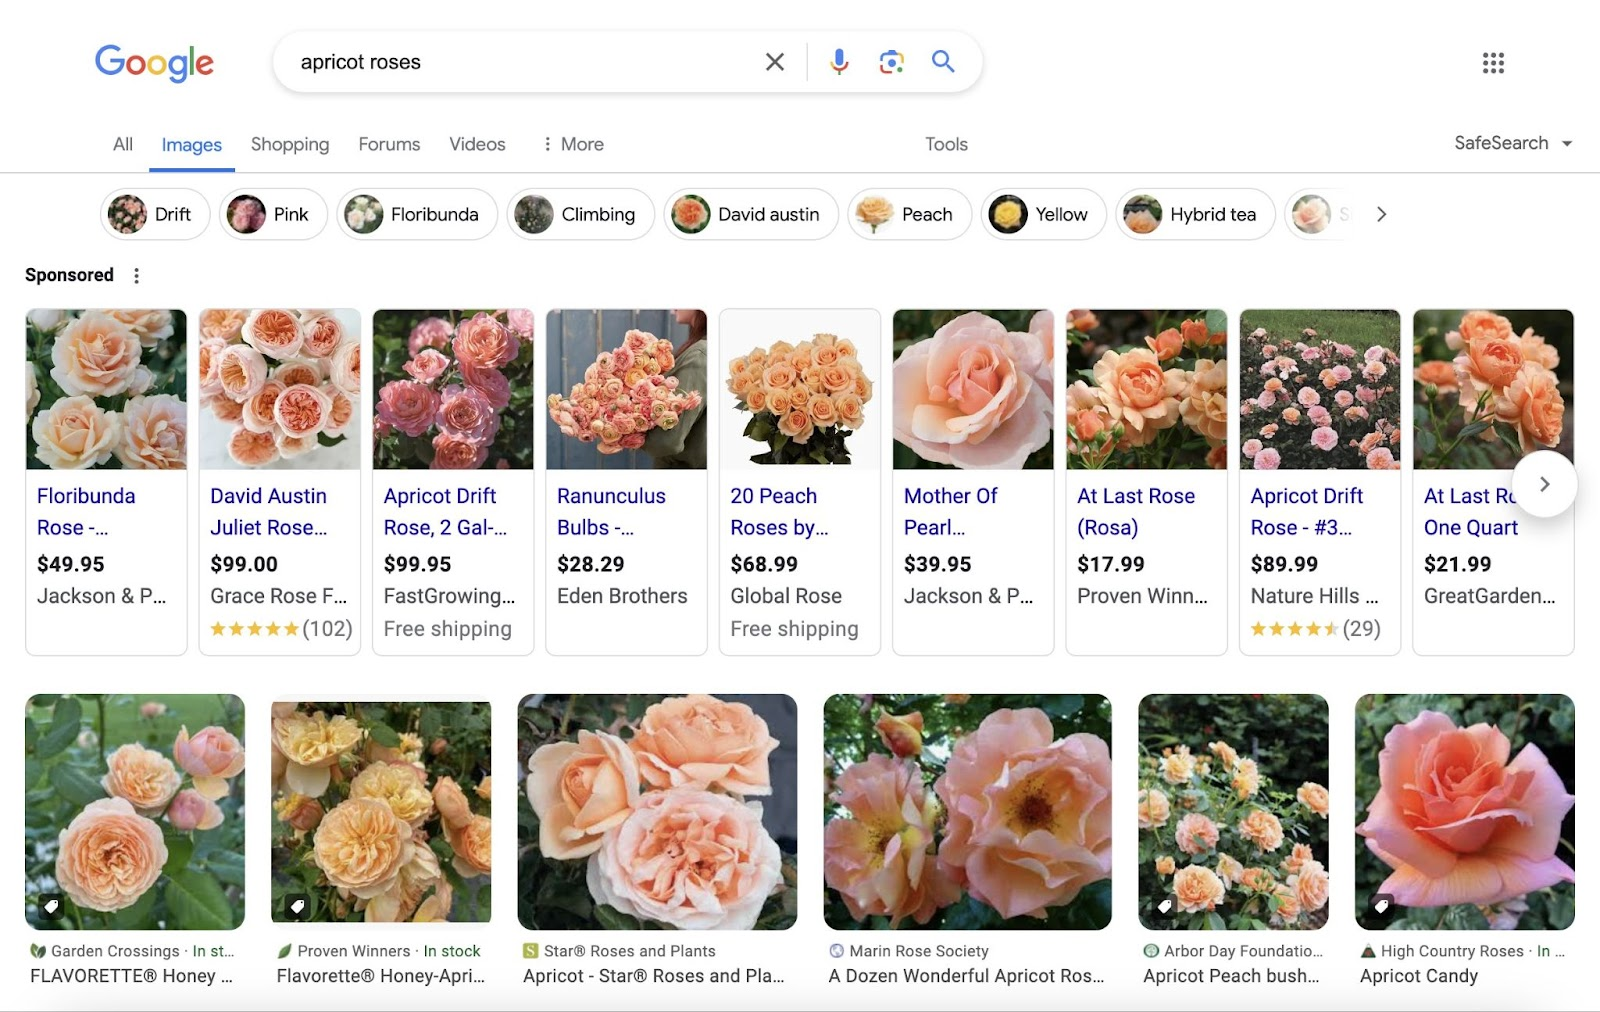
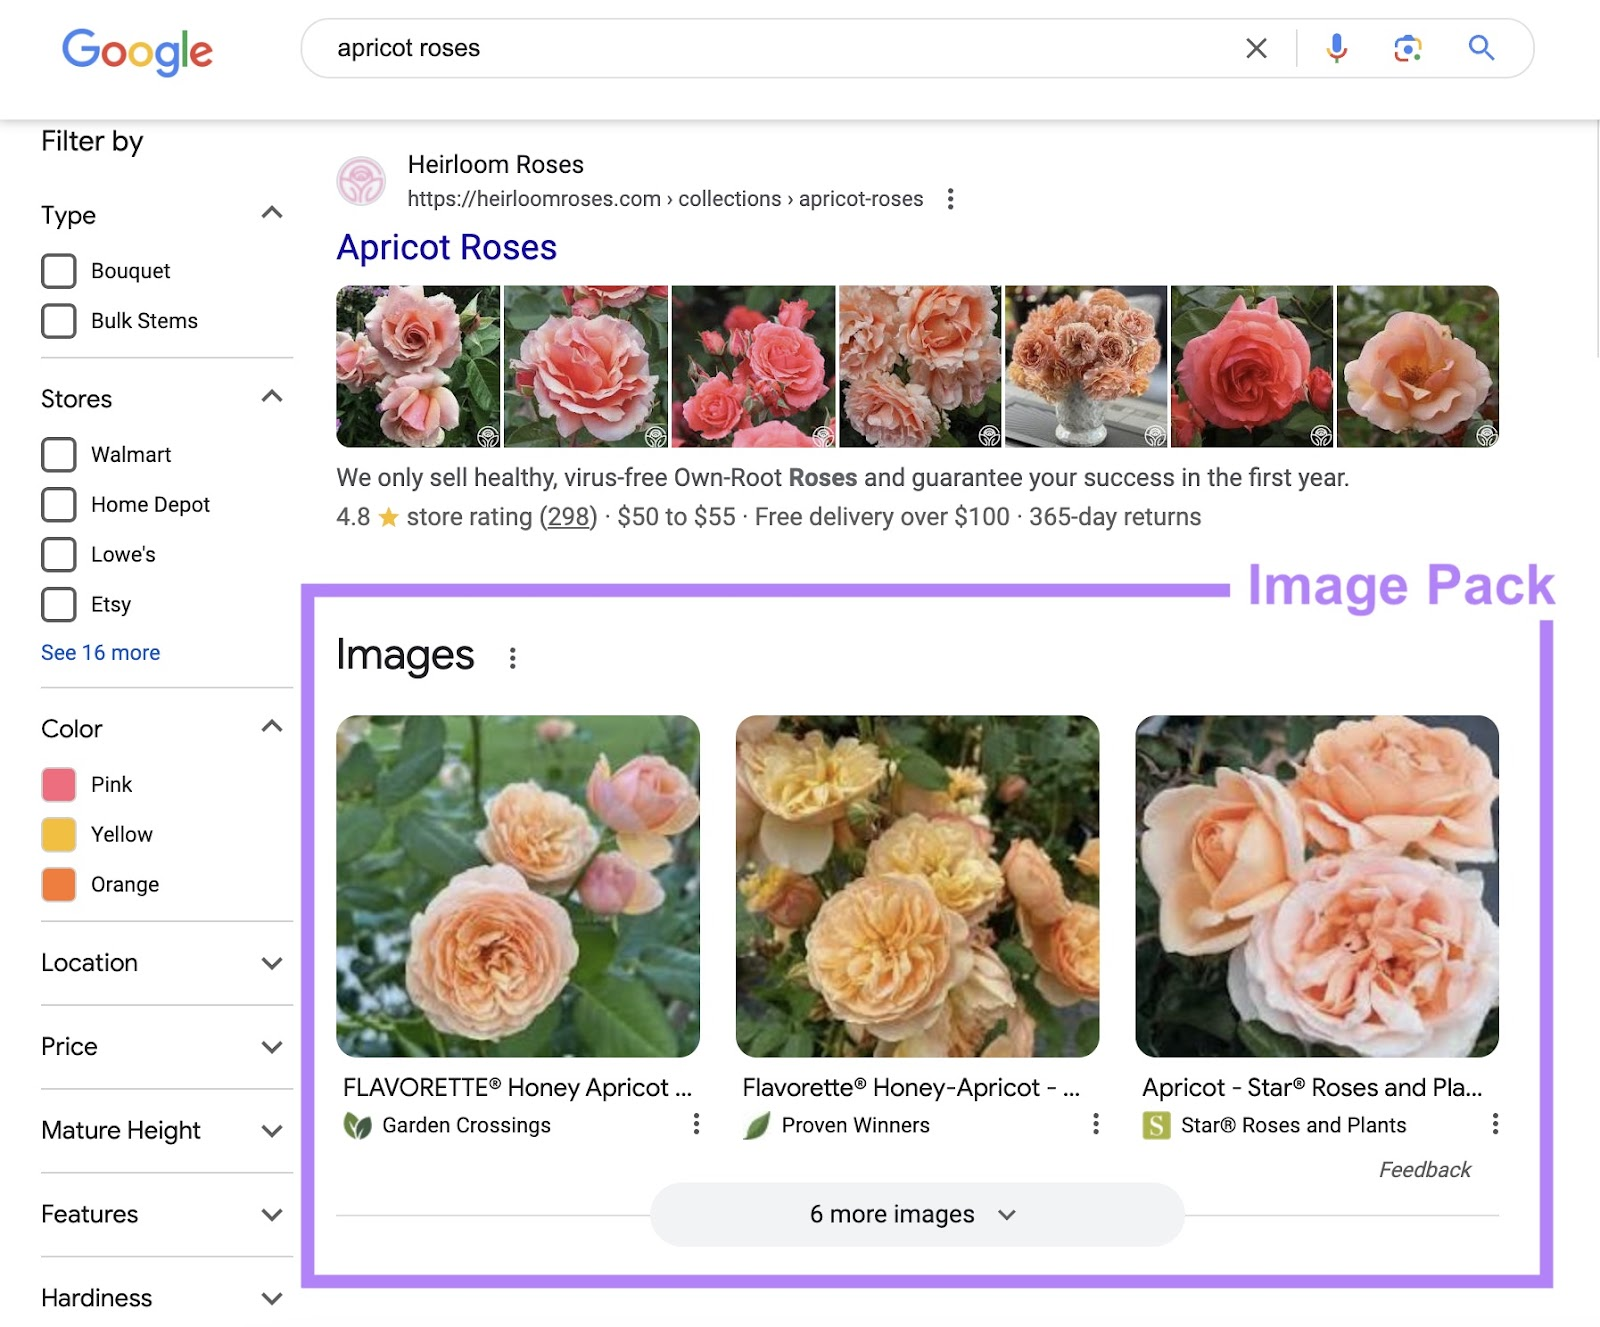
Many people turn directly to Google Images to find visual content. For instance, searching for “apricot roses” brings up a selection of images from different websites, making it easy for users to find exactly what they’re looking for.
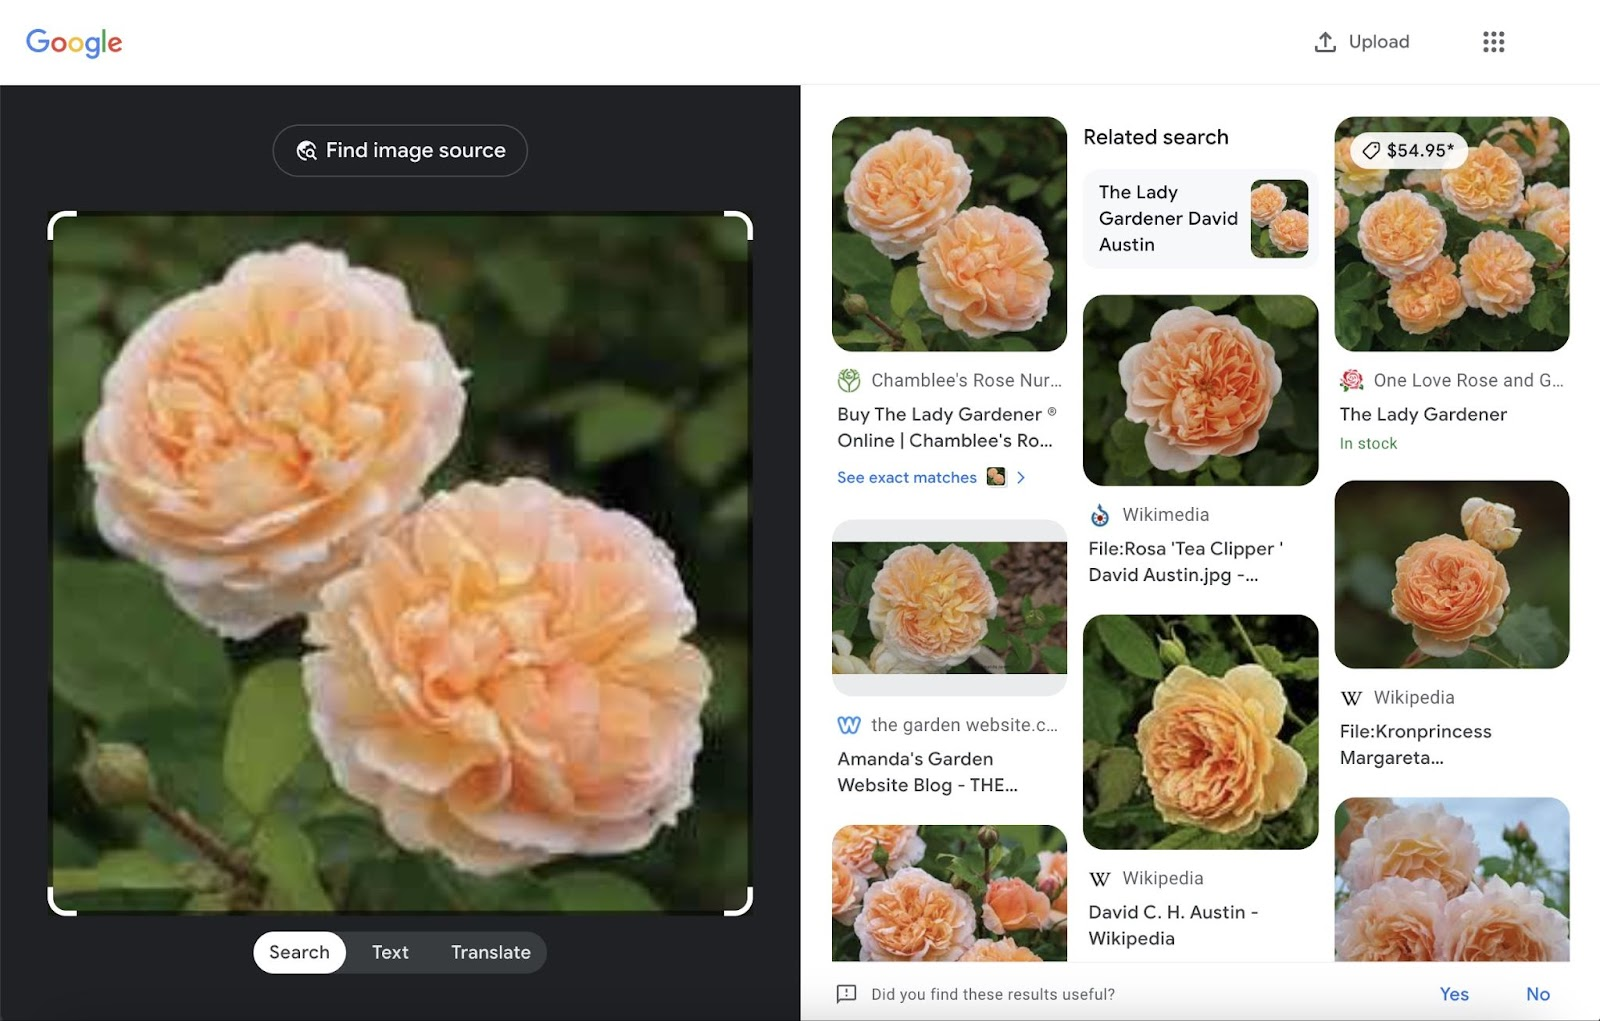
Moreover, Google Lens is widely used, with billions of monthly searches. This tool allows users to perform visual searches by simply pointing their camera at an object or uploading an image. For example, a search on Google Lens for “apricot roses” will deliver visually similar results, helping users find more images that align with what they want.
In addition to Google Images and Lens, images frequently appear in standard Google search results. As of April 29, 2024, Semrush Sensor reported that in the U.S., 55.62% of standard SERPs included an image offering users a richer, more engaging browsing experience.
These visual results catch users’ attention and can significantly increase click-through rates. Additionally, implementing SEO for images not only helps your images rank but also strengthens the visibility of your site overall, positively impacting your other search rankings as well.
Choose The Right Image Format
Although there are numerous image formats available, Google Search recognizes only specific ones: JPEG, PNG, WebP, BMP, GIF, and SVG.
Let’s look at the key differences among these formats and their impact on SEO and website performance:
- PNG: This format uses lossless compression, meaning no data is lost in the process, resulting in high-quality images that support transparency. However, PNG files tend to be larger, making them ideal for print but potentially slowing down website loading times.
- JPEG: Utilizing lossy compression, JPEG reduces file size at the cost of some image quality. However, you can adjust the quality level to achieve a balance that fits your website’s needs without significantly affecting loading speed.
- WebP: Created by Google, WebP offers both lossless and lossy options and is more efficient than JPEG, often reducing file sizes by 25% to 80% while maintaining similar quality. Supported by most major browsers, WebP is an excellent choice for web images due to its optimization for both quality and size.
- GIF: Using lossless compression, GIF files are limited to a palette of 256 colors, which makes them suitable for basic graphics or animations but less effective for high-quality images.
- SVG: As a vector-based format, SVG is ideal for logos, icons, and scalable graphics. It can adjust to any screen size without impacting file size, making it highly useful for responsive web design.
- BMP: Known for high-quality, uncompressed images, BMP files are large and typically unsuitable for websites due to their impact on loading times.
Generally, PNG is a good choice for high-quality images on websites, especially if converted to WebP for web deployment to reduce file size while retaining quality.
When considering converting GIFs to WebP, be aware that older browsers, such as Safari 15.6 (macOS Catalina) and earlier versions, do not support animated WebP formats. Fortunately, only a small percentage of users rely on outdated browsers, so this may not be a significant issue for most sites.
Finally, when implementing any new image format or technology, it’s wise to monitor your traffic sources in Google Analytics to ensure that the majority of your users can support it. Regularly checking this data helps ensure a consistent user experience across devices and browsers.
How Compression Affects Image Quality And Load Times
To illustrate this, let’s consider a sample image initially in BMP format, which we then convert to several other formats to observe changes in file size and load times on a webpage.

The results below reflect my observations:
| Image Format | File Size | Load Time on 3G Connection | Load Time on Fast Connection (128 MB/sec) |
| BMP | 1900 KB | 17.22 sec | 311 msec |
| PNG | 552 KB | 9.16 sec | 156 msec |
| GIF | 265 KB | 5.89 sec | 89 msec |
| JPG | 91.5 KB | 2.91 sec | 47 msec |
| WebP | 41.2 KB | 1.77 sec | 29 msec |
The tests were conducted on a local Apache server, with images embedded in a sample HTML page.
This comparison highlights WebP’s effectiveness: it achieves the smallest file size and significantly reduces load times-loading five times faster than PNG and nearly twice as fast as JPG on a 3G connection.
This performance boost is why WebP is a recommended format for website images. Converting your images to WebP can greatly improve load times, though there are cases where a WebP file may end up larger than the original. You can learn more about this on Google’s FAQ page.
However, using a compression algorithm when converting images can affect image quality, potentially reducing sharpness. Choosing the right format should therefore depend on the needs of your website. For example, photography sites that require high-detail retention should opt for PNG over JPG or WebP for large, high-quality images. Alternatively, you could use WebP thumbnails linked to full-quality PNG images.
To dive deeper into image optimization, let’s talk about image compression tools such as ShortPixel and TinyJPG.
These services go beyond basic compression by applying advanced algorithms and removing unnecessary metadata, like EXIF data and GPS tags, to further reduce file sizes. Using both lossy and lossless techniques, they selectively eliminate data that doesn’t greatly affect image quality as perceived by the human eye.
For instance, converting our sample image from JPG to WebP with ShortPixel’s lossy compression results in a file size of just 8.3 KB, while TinyJPG produces a similar 8.7 KB file.
Here are some popular image compression tools worth exploring:
- ShortPixel
- TinyJPG
- EZGIF
- Kraken.io
Keep in mind that, especially for images containing text, compression can occasionally distort the text or other detailed elements. It’s best to evaluate the quality after compression to ensure it meets your requirements.
What About The AVIF Format?
AVIF is a relatively new image format now compatible with all major browsers, with Google Search recently adding support for it.
AVIF offers exceptionally high compression through lossy algorithms. For instance, the same image can be as small as 11 KB in AVIF compared to 41 KB in WebP.
However, as seen in the comparison below, this level of compression may affect image quality. AVIF can cause a flattening of finer details or irregularities, which are retained more effectively by WebP.
If you find AVIF quality suitable for your needs, you can implement it by setting AVIF as the first <source> in the <picture> tag. For browsers that don’t yet support AVIF, they’ll skip to the next available format, ensuring a seamless fallback.
This progressive enhancement method helps maintain compatibility across different browsers and devices.
In a later section of this article, we’ll dive into the srcset and sizes attributes. These attributes allow you to tailor images for various screen sizes and devices, ensuring they load quickly and are optimized for mobile.
What erchant Center Product Images
For product images, maintaining a 1:1 aspect ratio (square) helps create a consistent, visually appealing presentation. Aim to have the product fill 75%-90% of the frame, allowing it to stand out clearly in the image.
To keep attention on the product, use white or transparent backgrounds. Google Merchant Center Next now includes Product Studio, an AI-powered tool that can remove backgrounds and enhance image resolution effortlessly.
Ensure images are properly resized and optimized for resolution before uploading to promote fast load times and sharp quality. Adding descriptive alt tags is essential; include details such as the product name, type, and key attributes (like color) to help improve search engine visibility.
Try testing both standalone product images and lifestyle shots to determine which resonates best with your audience. Unique images taken in-house are often more engaging and SEO-friendly than manufacturer or stock photos.
Consider using multiple product images within a crawlable, indexable carousel. This allows users to view different angles and features, increasing their engagement and time spent on the page.
On product detail pages (PDPs), position images above the fold on both desktop and mobile views to ensure users see them immediately.
Adding videos alongside images can create a more immersive experience, further enhancing user engagement.
Lastly, avoid reusing the same product image across multiple PDPs. By providing unique visuals on each page, you improve SEO and keep the content fresh.
Image Sizing & SEO
Compress images before uploading them to your CMS to maintain fast page loading speeds and prevent user frustration. Avoid resizing images solely with CSS or HTML attributes; instead, adjust the actual file size based on the image’s intended use, whether for backgrounds, hero images, banners, or blog posts. Refer to your CMS guidelines, like WordPress’s image size recommendations, for optimal dimensions.
While Google doesn’t specify image size requirements for search results, images must be indexable and accessible to be eligible.
Here’s a breakdown for different page types, SEO purposes, and specific elements:
- Google News: Use several high-resolution images (at least 800,000 pixels) in 16:9, 4:3, and 1:1 aspect ratios. Follow [Google News guidelines].
- Google Discover: Opt for large images (minimum 1200 pixels wide) with the max-image-preview directive enabled. See [Google Discover guidelines].
- Hero images: Aim for at least 1000 pixels wide with a 16:9 aspect ratio. Use an aspect ratio calculator to verify dimensions.
To assess your images’ load speeds and get comprehensive optimization insights, try Google’s PageSpeed Insights tool.
Cheat Sheet: Recommended Image Sizes for SEO (Pixels and Aspect Ratios)
Open Graph Protocol
- 1600 x 900 (16:9)
- 1200 x 675 (16:9)
- 1200 x 1200 (1:1)
- 1200 x 900 (4:3)
Google Discover
- 1200 x 675 (16:9)
- 1200 x 900 (4:3)
- 1200 x 1200 (1:1)
Google News
- 1200 x 675 (16:9)
- 1200 x 900 (4:3)
- 1200 x 1200 (1:1)
Blog or Article Hero Images
- 1600 x 900 (16:9)
- 1200 x 675 (16:9)
- 1200 x 1200 (1:1)
- 1200 x 900 (4:3)
Infographic Image Size
- 600 x 2400 (1:4)
Google Business Profile Images
- Posts: 1200 x 900 (4:3)
- Logo: 720 x 720 (1:1)
- Other photos: 1200 x 900 (4:3), 1200 x 1200 (1:1), 1200 x 675 (16:9)
eCommerce Product Images
- Minimum 1500 x 1500 (1:1) with the product covering 75%-90% of the frame.
Google Merchant Center Product Images
- At least 1500 x 1500 (1:1)
Choosing the right size and format for each type of image not only enhances user experience but also contributes to better SEO performance.
eCommerce & Google Create Unique Images
For product images, maintain a square (1:1) aspect ratio to achieve a consistent and visually appealing display across your website. Aim to have the product fill about 75%-90% of the frame, ensuring it stands out prominently in each image.
Using a white or transparent background helps keep the viewer’s focus on the product itself. Google Merchant Center Next provides Product Studio, an AI-powered tool that can enhance resolution and remove backgrounds for cleaner images.
Make sure to optimize the resolution and resize images appropriately before uploading. This practice ensures that images load quickly and appear sharp on various devices. Including descriptive alt tags with the product’s name, type, and essential attributes (such as color) can further boost search visibility.
Consider testing both standalone product images and lifestyle shots to determine what resonates best with your audience. Unique images taken specifically for your site often lead to better engagement and improved SEO compared to generic stock or manufacturer images.
For a more engaging user experience, incorporate multiple images in a crawlable, indexable carousel. This approach allows users to explore various angles or product features, increasing their time spent on the page.
Position product images prominently, above the fold on both desktop and mobile product detail pages (PDPs), to make sure they’re immediately visible.
Adding video content alongside images can also enrich the user experience, offering a more dynamic view of the product.
Lastly, avoid reusing identical images across different PDPs. Providing unique images for each page keeps your content fresh and improves SEO.
Optimize Image File Names
In SEO, using descriptive, keyword-focused (but not overly stuffed) file names for images is essential. Properly named image files help Google and other search engines understand the content of the image.
File names such as “IMG_722019” or similar random codes do little to clarify the image’s subject for search engines. While Google’s ability to interpret image content has improved, assigning meaningful file names still plays a valuable role in helping Google understand your images more accurately.
Renaming files from their generic default names enhances SEO by making the content clearer to search engines.
Although this may take some time-especially if you have a large media library-renaming images to something descriptive and relevant is a worthwhile effort that can positively impact your SEO.
Alternative (Alt) Text for Images
Alt text plays several crucial roles:
- Describes the image to search engines, helping with image indexing.
- Displays when an image doesn’t load, offering context to users.
- Serves as a description for screen readers, supporting accessibility for visually impaired users.
Alt text is a key factor in how search engines interpret image content. For best results, provide a clear and accurate description without being overly lengthy, as Google views alt text as the primary attribute for understanding an image.
Best Practices for Alt Text:
- Be Relevant and Descriptive: Write alt text that benefits both search engines and users, e.g., “Karrie Lane’s 2024 professional headshot.”
- Avoid Redundancies: Skip phrases like “picture of” or “photo of,” as these add unnecessary words.
- Incorporate Keywords Naturally: Use keywords in a way that enhances SEO but avoids stuffing.
- Keep it Concise: Aim for brevity to keep the alt text focused and relevant.
- Be Specific: Use precise terms, like “Honda Civic” rather than a general “car,” to provide more detailed information.
- For Icons: Describe the icon’s purpose, such as “Visit LinkedIn page,” to help users understand its function.
- Provide Context: Ensure the alt text aligns with the page’s subject to improve user experience. For instance, in an article on beginner strength training, a more informative alt text might be “woman demonstrating beginner-friendly strength training exercise in a weight room” instead of just “person lifting weights.”
By writing alt text that is contextually relevant to the page, you enhance user experience while also aiding search engine comprehension.
The Problem with Using Text in Images
It’s best to avoid placing text within images, as this practice does not align with accessibility guidelines; screen readers can’t interpret the text embedded in images. When text in an image is necessary, ensure that the exact wording is repeated in the alt attribute to support accessibility for all users.
While tools like Google Cloud Vision API and Google Keep can extract text from images, these technologies are still evolving and may miss details or misinterpret the text. Relying solely on these tools can lead to incomplete or incorrect information being indexed.
If you include text in a featured image, verify that it won’t be cropped if the image dimensions adjust-such as when square versions are displayed on platforms like Instagram or in Google’s rich search results.
Do Image Captions Help SEO?
Captions offer valuable context for images, enhancing user experience and engagement on the page. Although captions don’t directly influence SEO, they help visitors understand the images, which can indirectly benefit SEO by lowering bounce rates and increasing time spent on the site.
- Best Practices for Image Captions:
- Use Captions When Helpful: Add captions to clarify or add context where needed.
- Avoid Redundancy: Don’t repeat the alt text in the caption—keep each element unique.
- Ensure readability : Capitalizing the initial word and any proper nouns.
- Be Brief and Clear: Captions don’t need full sentences or punctuation; keep them short and easy to read.
Following these guidelines can enhance the clarity and relevance of your images without cluttering the page.
Image Title Tags: Not the Same as Alt Tags
Title tags appear when users hover over an image or link, providing additional information. They aren’t mandatory, don’t impact search rankings, and aren’t visible to users on mobile devices.
If you do choose to use title attributes, ensure that the text adds extra value, as most users won’t interact with it. Remember, these tags are not accessible to mobile users or those using screen readers.
Make images mobile friendly
Google’s mobile-first indexing means that its crawlers primarily evaluate the mobile version of a website, so it’s essential for your images to be optimized for mobile. To achieve this, make sure both your images and site layout are responsive across various screen sizes.
Many website builders and templates adjust image dimensions automatically, but you can also define image sizes based on screen width through custom CSS. Adding a few lines of code can enhance your images’ responsiveness-consider checking out a basic guide on responsive design to get started.
Use unique images
While viewers can interpret images visually, search engines rely on alternative text to understand them. Without alt text, search engines struggle to accurately index image content, which can impact your page’s visibility.
Effective alt text provides important context, enhances accessibility for visually impaired users, and can still inform search engines about the image’s relevance even if it fails to load. Craft alt text that goes beyond the file name, aiming for a brief but descriptive 10-15 words to convey key details about the image.
Tip: Including brand-related terms in alt text can improve visibility, but keep it natural-avoid overloading with keywords.
Use site maps
Google describes a sitemap as “a file where you can list the web pages of your site to tell Google and other search engines about the organization of your site content.” Essentially, it’s a structured map that outlines your site’s content.
Sitemaps are vital for SEO, as they inform search engines about your site’s pages and layout. To ensure that search engines can discover all visual content-such as infographics, memes, photos, or video thumbnails-be sure to include these in your sitemap.
For each image, provide details like the title, description, URL, caption, and license information. For videos, add the title, description, URL, thumbnail URL, and direct link to the video file.
If your site runs on WordPress, plugins like Yoast SEO can simplify this process by automatically adding images and videos to your sitemap.
Lazy-Loading Images
For images that don’t appear instantly when a user opens your page, consider adding the loading=lazy attribute in the HTML. This helps improve page load speed by delaying the loading of non-essential images until they are close to the user’s viewport.
However, it’s essential to implement lazy loading correctly; if done improperly, it can prevent Google from accessing these images. For best practices and detailed instructions, refer to Google Search’s guidelines on lazy loading to ensure all image content remains accessible.
Image UX & SEO
Using unique and relevant images can boost click-through rates and user engagement, both of which positively impact SEO by signaling to search engines that your content resonates with users.
Prioritize your featured images by ensuring they align with the search intent and needs of your audience-whether that’s through infographics or detailed product views, for example.
Image SEO – Frequently Asked Questions
Do I need copyright permissions to use images on my website?
Yes, if you’re using images that are copyrighted, it’s crucial to get permission to avoid any legal repercussions. Alternatively, you can opt for royalty-free images or create your own unique visuals to stay on the safe side.
Can having too many images negatively impact a page?
Definitely. Overloading a page with images can lead to a crowded layout and negatively affect the user experience. Additionally, too many images can slow down the page’s load time. Furthermore, too many photos can slow the page’s loading speed.. Focus on using only relevant images that genuinely enhance your content.
Should I make images shareable for social media?
Absolutely. Designing images specifically for social sharing can greatly boost your content’s reach and engagement. Visuals attract attention on social media, encouraging users to click through to your content.
Wrapping Up
Image SEO plays a crucial role in enhancing your website’s visibility, engagement, and overall performance. By optimizing images with relevant keywords, appropriate formats, and proper alt tags, you can help search engines understand your content better while creating a seamless user experience. Don’t overlook the power of high-quality visuals-invest the time to optimize them and watch your site’s engagement and rankings improve. At Octopuswriters, we understand that a strategic approach to Image SEO can be a game-changer in today’s competitive digital landscape. Let us help you craft content that combines optimized visuals with engaging, relevant text for the best SEO results.